Bosses in Arcane Lineage range from easy enough for a new player to defeat solo, to so challenging that they require multiple coordinated teams to conquer. Each boss presents a unique challenge with diverse mechanics, demanding both strategic planning and patience to overcome successfully. Defeating these bosses rewards players with some of the game's best loot and items, making them essential targets for those looking to advance. Follow our comprehensive Arcane Lineage Boss guide to gear up and prepare for the challenges ahead.
Recommended Videos
Table of Contents
- Arcane Lineage Boss List
- King Slime
- King Slime Location
- King Slime Fighting Strategy
- King Slime Drops and Rewards
- Yar’thul, the Blazing Dragon
- Yar’thul Location
- Yar’thul Fighting Strategy
- Yar’thul Drops and Rewards
- Thorian, the Rotten
- Thorian Location
- Thorian Fighting Strategy
- Thorian Drops and Rewards
- Metrom’s Vessel
- Metrom’s Vessel Location
- Metrom’s Vessel Fighting Strategy
- Metrom’s Vessel Drops and Rewards
- Arkhaia and Seraphon
Arcane Lineage Boss List
| Boss | Location | Difficulty |
|---|---|---|
| King Slime | Around the City | Easy |
| Yar’thul, the Blazing Dragon | Inside Mount Thul | Normal |
| Thorian, the Rotten | Deep in the Cess Grounds | Hard |
| Metrom’s Vessel | Deeproot Canopy | Very Hard |
| Seraphon | Unlocked by ranking up in the Church of Raphion | Hard |
| Arkhaia | Unlocked by ranking up in the Cult of Thanasius | Very Hard |
King Slime
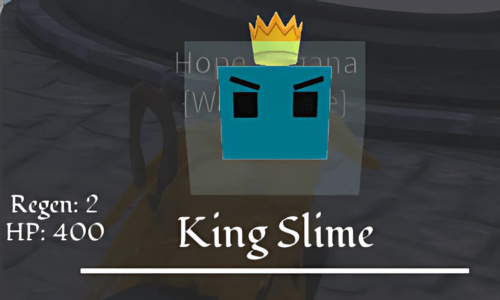
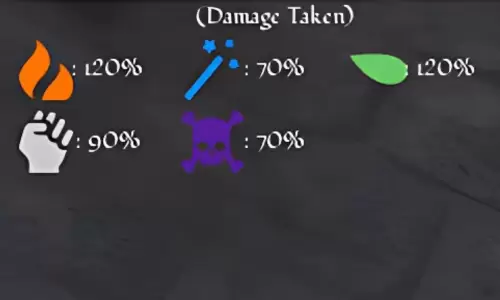
King Slime is more of a mini-boss, less threatening than other Bosses in Arcane Lineage. However, it can still be a challenge for low-level players. Note that defeating King Slime does not yield soul points.
King Slime Location
King Slime spawns after 100 Slimes are defeated on the server. It appears around the city closest to the last slain slime's location, with a notice on the Quest Board alerting players to the active King Slime quest. The quest has two steps:
- Find the King Slime
- Kill the King Slime
The quest has a 30-minute global cooldown on the server.
King Slime Fighting Strategy
King Slime spawns with 400 HP (600 HP if Corrupted), making it the boss with the lowest health in Arcane Lineage. Its main attack involves summoning additional Slimes that can overwhelm your party over time. King Slime also uses AOE poison attacks, so come equipped with potions and cleansing abilities. Once you manage the summoned Slimes, you can defeat King Slime in just a few turns. Its AOE attacks only inflict the Poisoned status without dealing direct damage, giving you ample opportunity to attack.
| Attacks | Energy Cost | Effect |
|---|---|---|
| Slime Creation | 1 | Summons a Slime to fight for King Slime. |
| Crush | 0 | King Slime lunges forward, attacking a party member. |
| Poison Eruption | 2 | King Slime throws out a burst of Acid, poisoning your party. This attack cannot be dodged or blocked. |
| Scalding Spray | 3 | King Slime erupts with boiling hot liquid, poisoning your party. This attack cannot be dodged. |
King Slime Drops and Rewards
Defeating King Slime can yield the following drops:
- Random Tier 1 Equipment
- Slime Buckler
- Gelat Ring
Completing the King Slime event from the Quest Board offers these rewards:
- Ferrus Skin Potion
- Small Health Potion
- Essence
- Gold
Yar’thul, the Blazing Dragon
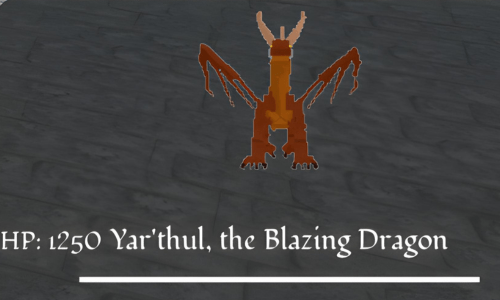
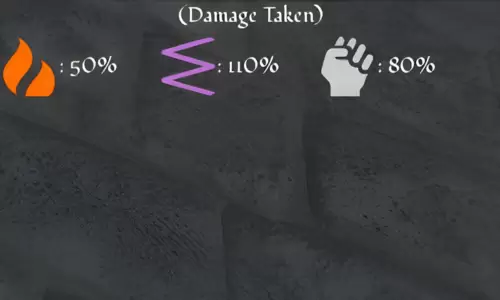
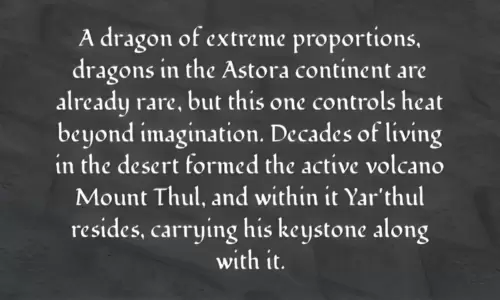
Yar’thul is a fire-type boss that utilizes Fire and Inferno-based attacks to inflict damage. Most of its attacks apply Inferno and Burning stacks, making the fight challenging without proper preparation. It's resistant to fire and physical damage but weak to Hex damage.
Yar’thul Location
To locate Yar’thul in Arcane Lineage, venture deep into the Desert. At the heart of the Desert lies Mount Thul, an active volcano created by Yar’thul’s intense heat. Navigate through Mount Thul's dark corridors to reach the Blazing Dragon at its end.
Yar’thul Fighting Strategy
Yar’thul boasts 1200 HP (1800 HP if Corrupted), compensating for its lower health with high damage output. Its attacks often inflict Inferno and Burning effects, turning the battle into a race against time to defeat the dragon before succumbing to the flames. Upon dropping below 50% health, Yar’thul enters a second phase, summoning giant meteors that stun the party and reduce healing effectiveness. In this phase, swiftly ending the battle is crucial, as prolonged exposure to the meteors can wipe your team. The Dragon Ring and at least Pristine-level Accessories can ease this fight. The Corrupted version gains lifesteal.
| Attacks | Energy Cost | Effect |
|---|---|---|
| Inferno | 0 | Automatically activated at the start, inflicting the Inferno status effect on the party. This attack cannot be dodged or blocked. |
| Fire Claw | 0 | Yar’thul slashes with fire-imbued claws, dealing light damage. |
| Magma Pillar | 2 | Yar’thul slams the ground, creating a pillar of magma. Attacking through the pillar deals damage and inflicts 2 stacks of Inferno and 5 stacks of Burn. Lasts 3 turns. |
| Blaze Core | 3 | Yar’thul consumes the party's Inferno stacks, healing based on the amount consumed. |
| Blaze Eruption | 2 | Yar’thul slams its arms into the ground, damaging burning targets and applying scaling Inferno and Burning stacks. |
| Magma Beam | 4 | Yar’thul charges a devastating beam of fire for 1 turn, firing it on the next turn for massive damage and affecting adjacent units. This attack cannot be dodged or blocked. |
| Hellfire | 1 | Yar’thul sends out an unstoppable wave of fire, lightly damaging the whole party and applying 9 stacks of Burning. This attack cannot be dodged or blocked. |
| Armageddon | 6 | When Yar’thul falls below 50% Health, it may use this ultimate move, summoning a large meteor to devastate the party, dealing massive damage, applying healing reduction, and potentially stunning the party. This attack cannot be dodged or blocked. |
Yar’thul Drops and Rewards
Defeating Yar’thul guarantees the following rewards:
- Absolute Radiance
- Permafrost Curse
- Wild Impulse
- Heavenly Prayer
- Breath of Fungyir
- Narhana’s Sigil
- Reality Watch
- Shifting Hourglass
- Ring of the Dragon
- The Void Key (Corrupted Yar’thul)
Possible drops include:
- Dragontooth Blade
- Dragonbone Gauntlets
- Dragonbone Spear
- Dragonflame Shield
- Memory Fragment
- Soul Dust
- Phoenix Tear
- Resplendant Essence
- Lineage Shard
- Skyward Totem
Thorian, the Rotten
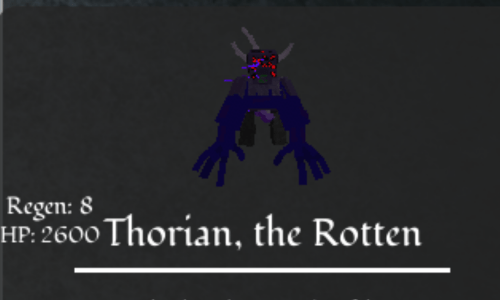
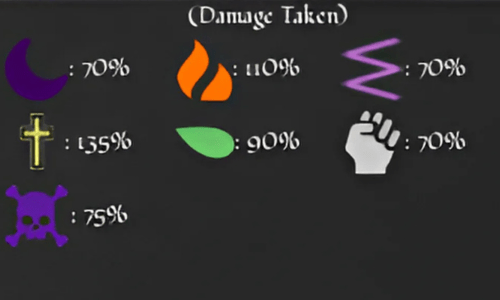
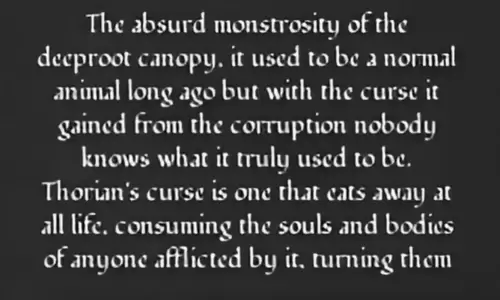
Originally an animal in the Deeproot Canopy, Thorian became corrupted over time, transforming into a towering abomination with multiple red eyes and tentacles. It curses anyone it encounters and is resistant to nearly all elements, with a significant weakness to Holy damage.
Thorian Location
Thorian can be found in the deepest parts of the Cess Grounds, within the Deeproot Canopy. Enter the Cess Grounds and head right to reach Thorian's area, where this huge, abominable enemy is hard to miss.
Thorian Fighting Strategy
Thorian has 2,600 HP (3,900 HP if Corrupted). Its passive negates healing if the same attack type is used twice in a row, restoring 150% of the damage dealt. Therefore, varying attack types is crucial, which can be challenging with energy and cooldown management. Thorian is resistant to most damage types except Holy, which deals 135% damage. It's also slightly weak to fire, though the damage increase is only 10%.
When Thorian's health drops below 50%, it unleashes a devastating attack, inflicting Plague, Curse, and Hexed on the party. This move has a 15-turn cooldown, so it's unlikely to hit twice in most fights.
| Attacks | Energy Cost | Effect |
|---|---|---|
| Cursed Wave | 2 | Thorian attacks 3 party members, dealing damage with a chance to inflict Curse. |
| Overflowing Curse | 0 | Initiates a minigame; failing results in the Plague status. This attack cannot be dodged or blocked. |
| Cess Breath | 1 | Thorian emits a wave of rotten air, dealing AOE damage and debuffing the party. |
| Warped Crush | 1 | Thorian charges the party, dealing damage to 3 party members. |
| Blasphemous Obliteration | 5 | When Thorian falls below 50% Health, it devastates the party, applying 1 stack of Plague, 3 stacks of Curse, and 1 stack of Hexed. This attack cannot be dodged or blocked. |
| Hexed Burst | 1 | Thorian sends out a small AOE wave, damaging the party with a chance to apply random debuffs (1 Hexed or 3 Curse). |
| Plague Rupture | 2 | Thorian applies a random debuff to a party member, then ruptures them, dealing massive damage scaling with the number of debuffs. |
Thorian Drops and Rewards
Defeating Thorian guarantees these rewards:
- Absolute Radiance
- Permafrost Curse
- Wild Impulse
- Heavenly Prayer
- Breath of Fungyir
- Stellian Core
- Metrom’s Amulet
- Darksigil
- Ring of Blight
- The Void Key (Corrupted Thorian)
Possible drops include:
- Blightrock Dagger
- Blightwood Staff
- Memory Fragment
- Soul Dust
- Phoenix Tear
- Resplendant Essence
- Lineage Shard
- Skyward Totem
Metrom’s Vessel
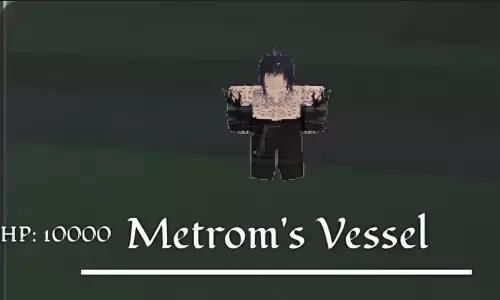
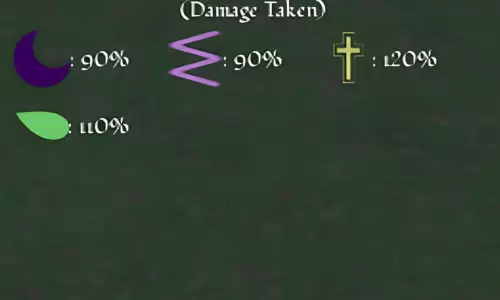

Once a valiant hero, Metrom’s Vessel now serves as a host for Metrom, who was sealed into a Temporal Jail after attempting to wreak havoc on all mortal races. The Temporal Jail significantly weakens him.
Metrom’s Vessel Location
Unlike other Bosses, Metrom’s Vessel is a Raid Boss that spawns on a global timer. To participate in this Boss Fight, you need a Void Key, obtained by defeating the corrupted versions of previous bosses. Once you have a Void Key, await the server-wide announcement of Metrom’s Vessel's spawn and its location.
Metrom’s Vessel Fighting Strategy
Metrom’s Vessel is a true statpile, boasting 10,000 HP (15,000 HP if Corrupted) and formidable damage negation, requiring 30 to 60 minutes to defeat. The fight is split into two phases, each with unique moves and mechanics.
In the first phase, Metrom’s Vessel has black wings that provide damage negation. Destroying these wings requires applying status effects and debuffs. Be cautious, as fewer wings increase the damage dealt by the boss. Timing wing destruction is crucial to avoid triggering second-phase attacks prematurely.
Additionally, Metrom’s Vessel summons Shadeblades, which are weak but deal significant damage. They have 200 HP, so eliminate them swiftly. Prolonged fights increase the chance of Metrom’s Vessel using Oblivion, an undodgeable attack that deals 50% max HP to everyone.
In the second phase, after shattering the Temporal Jail, Metrom’s Vessel's wings switch between Offensive and Defensive modes. Offensive mode increases damage and boosts summoned minions, while Defensive mode enhances damage resistance and adds Thorns Aura. Destroying wings in this phase remains the same, requiring status effects and debuffs. A Mini Shadebringer is summoned when a player fails to dodge an attack.
To succeed, coordinate with your team, apply debuffs, and manage damage-reducing effects. Mastery of timings and wing mechanics is key to overcoming this endurance battle.
Phase 1 Attacks
| Attacks | Energy Cost | Effect |
|---|---|---|
| Rendering Slash | 0 | Metrom’s Vessel lunges at the player, dealing damage and applying 3 Weakness stacks. |
| Deathbound | 1 | Metrom’s Vessel targets 2 random players, applying 3 stacks of Sundered. |
| Eclipse | 1 | Metrom’s Vessel buffs itself. |
| Invoke Shadeblades | 3 | Metrom’s Vessel summons two Shadeblades with 200 HP each. This attack cannot be dodged or blocked. |
| Hexed Rend | 3 | An undodgeable AOE slash that debuffs all players. This attack cannot be dodged or blocked. |
| Oblivion | 5 | Metrom’s Vessel uses ancient magic, dealing 50% of everyone’s HP and inflicting Curse. This attack cannot be dodged or blocked. |
Phase 2 Attacks
| Attacks | Energy Cost | Effect |
|---|---|---|
| Oblivion + Eclipse | 1 | Metrom’s Vessel uses Rendering Slash (P1) followed by a Hexed Rend (P1). |
| Unyielding Fury | 2 | An AOE debuff that gives all players 3 stacks of Blind and 2 stacks of Hexed. This attack cannot be dodged or blocked. |
| Minishade Bringer | 3 | Metrom’s Vessel shoots 3 Shadebringers. This attack cannot be dodged or blocked. |
| Shadebringer | 1 | Metrom’s Vessel slashes 3 Shadebringers, hitting the whole party and applying 4 stacks of Cursed. This attack cannot be dodged or blocked. |
| Blackout | 2 | Metrom’s Vessel debuffs the whole party. This attack cannot be dodged or blocked. |
Metrom’s Vessel Drops and Rewards
Defeating Metrom’s Vessel guarantees these rewards:
- Metrom’s Grasp
- Chaos Orb
- Expedite Anklet
- Echo Shard
- Tempurus Gem
- Arcanium Crystal
Possible drops include:
- Darkblood Staff
- Darkblood Dagger
- Darkblood Spear
- Darkblood Hexer
- Darkblood Sword
- Darkblood Cestus
Arkhaia and Seraphon
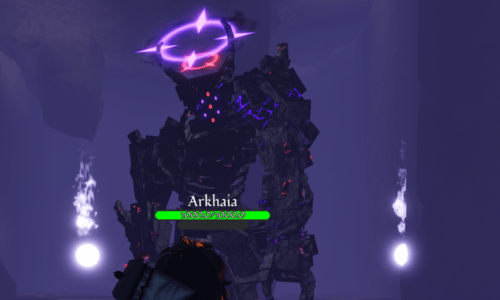
Information on Arkhaia and Seraphon is limited due to their rarity. Both are challenging bosses with complex mechanics, not suitable for beginners or new players, even with a strong party. They represent the pinnacle of current boss encounters in Arcane Lineage.
To unlock Arkhaia, reach rank 20 in the Cult of Thanasius. Arkhaia has 7,000 HP and features a damage-over-time mechanic that requires careful management. Defeating Arkhaia offers the choice to start a new character with the Inferion race, a powerful and rare starting option in Arcane Lineage.
To unlock Seraphon, reach rank 20 in the Church of Raphion. Seraphon has 4,500 HP, and defeating it allows you to choose the Sheea race for a new character, another powerful and rare starting option in Arcane Lineage.
This concludes our Arcane Lineage Boss guide. If you're looking to enhance your power, be sure to check out our comprehensive Arcane Lineage Class tier list and guide.


